
I absolutely fell in love with changing baskets a few months ago, that was until I saw the price. The cheapest I have seen around is £60. I had given up on the dream of ever having one until I saw someone chopping up their old moses basket to create one and thought OMG I can do that. I searched for a moses basket on facebook marketplace and found loads going for free; asked if it was still available and then I was on route to pick it up. Just a side note to be careful as we are still in a pandemic; I personally asked the woman to pop it outside for me and I picked it up on route to do my weekly shop so no unnecessary travelling. I also dettolled the shit out of it! Here is my DIY Changing Basket.
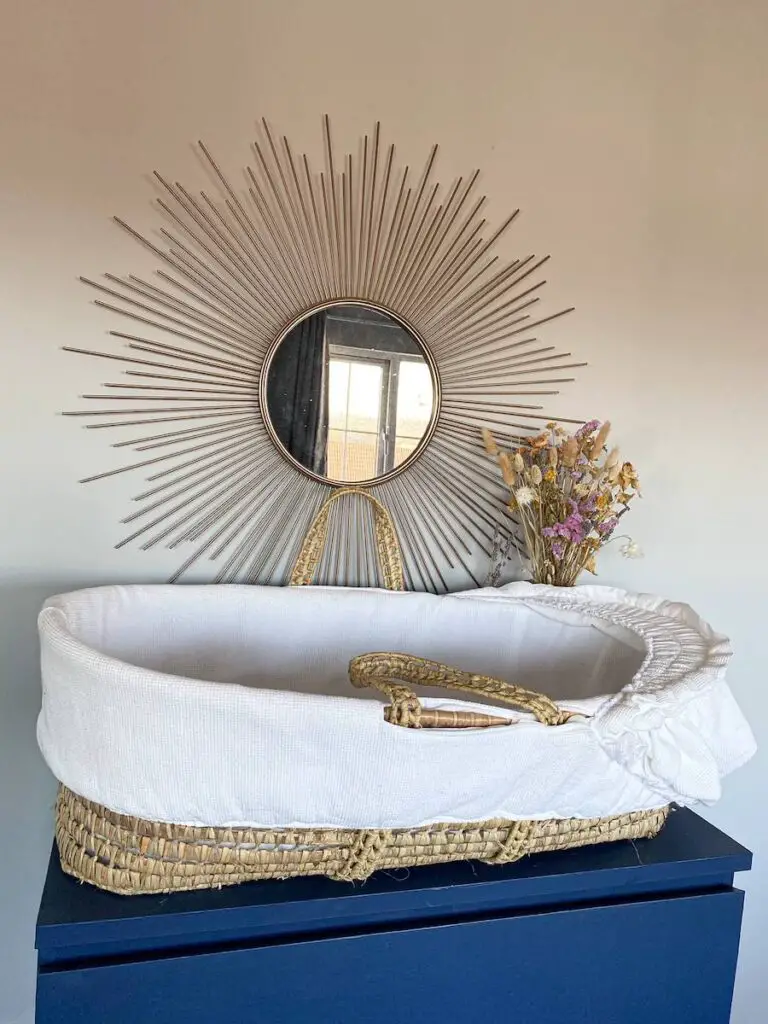
moses basket
Starting with the moses basket remove all of the fabric parts. Disconnect the hood and take it all down to the bare basket. Feel free to give the fabric a wash and use it as a spare for your own moses basket if you have one. Lord knows how messy the tiny ones are.
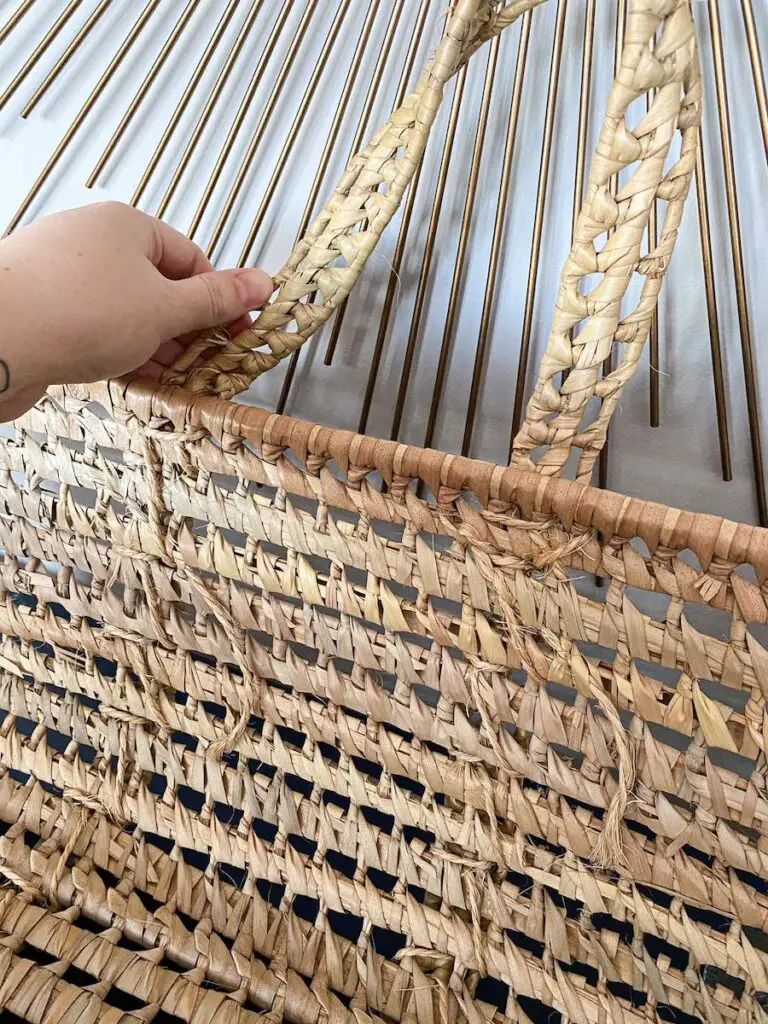
It’ll look a little something like this. Now what you need to do is remove the straps. I chose to unravel the straps as I wanted to pop them back on the changing basket afterwards but if you don’t want straps you can save yourself some time and just cut them off. I really think the handles add such character to the basket and would highly recommend taking the time to unravel them. I actually found it quite therapeutic.
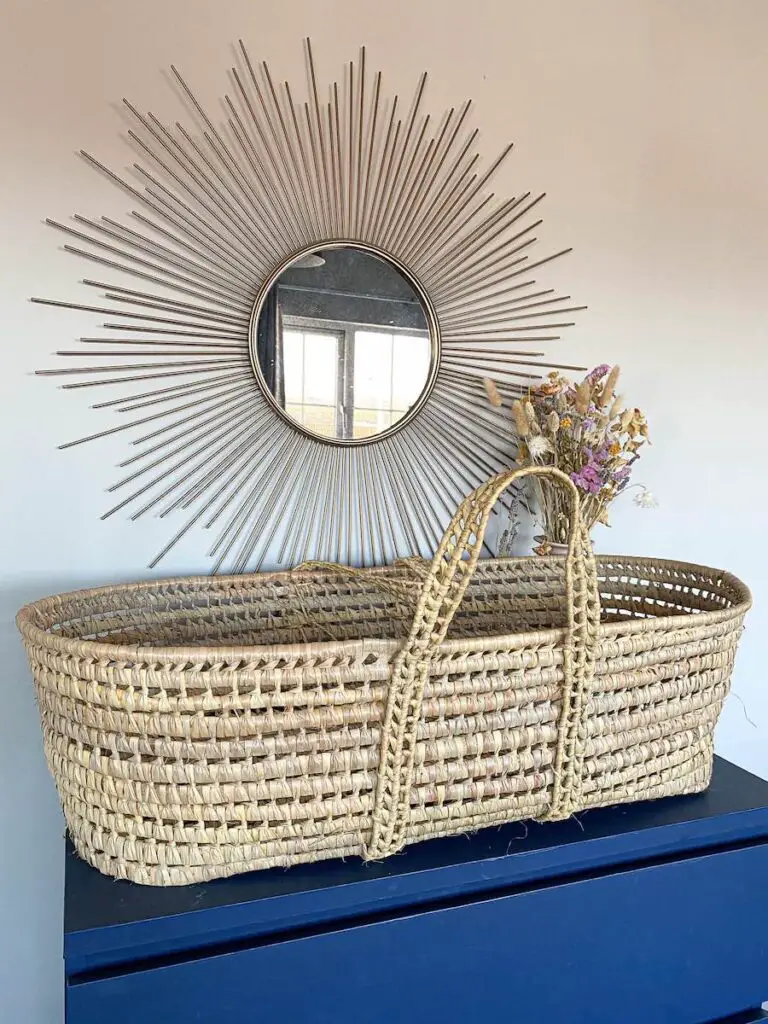
Now comes the fun bit. Chopping it up. Decide on the height you want your DIY changing basket, I chose around 5 lines up the basket, and start cutting. Cut all the way around the basket until the top literally lifts off. Now remove all the sharp bits until your left with a nice smooth top. Have a bin bag handy for this bit as it does get a little messy.

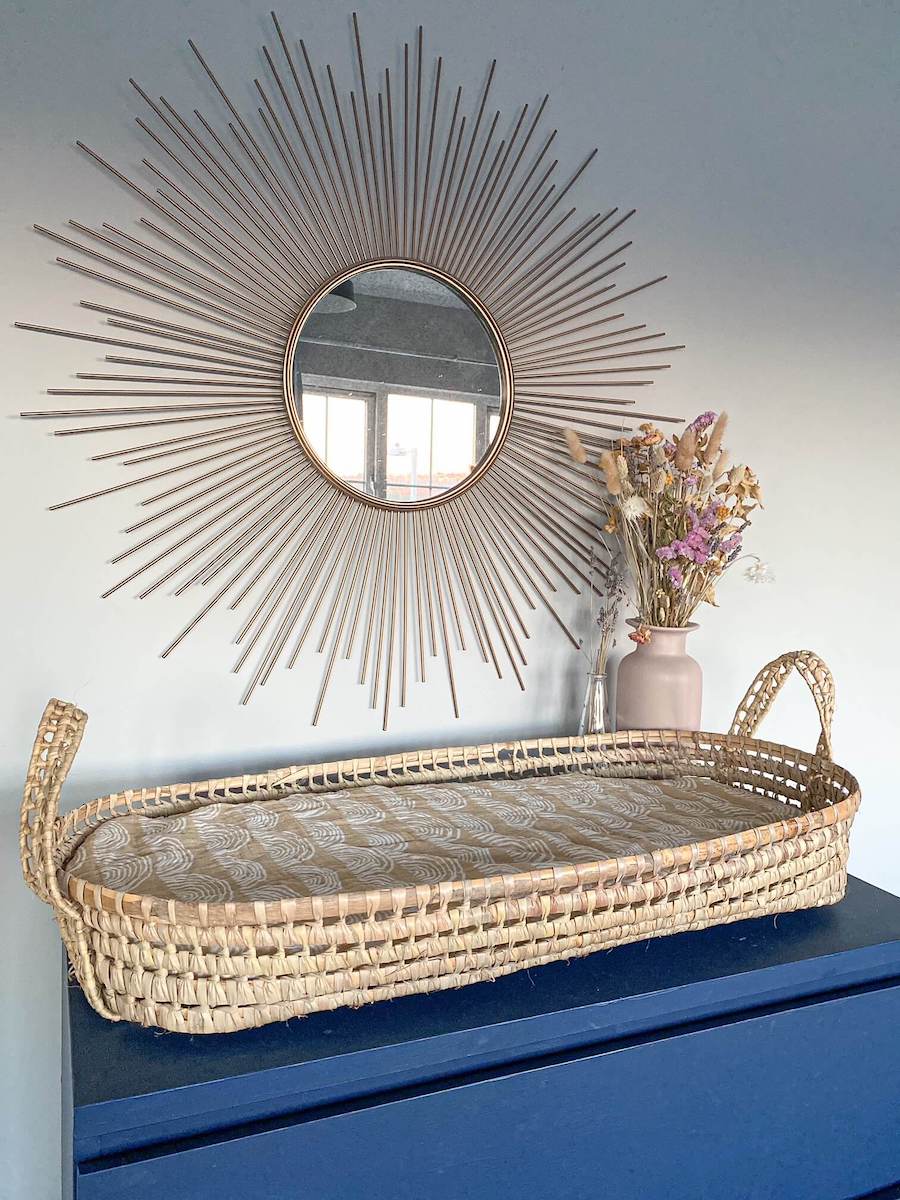
DIY Changing basket
Taadaa you have yourself one DIY Changing Basket. I decided to take it one step further and reattach the handles but at the opposite ends to the way they were positioned on the moses basket. You literally thread the string you removed earlier through the handles and basket until its secure and knot it. This gives an added touch to the changing basket and they won’t get in your way when you’re changing baby. Super easy and completely free.
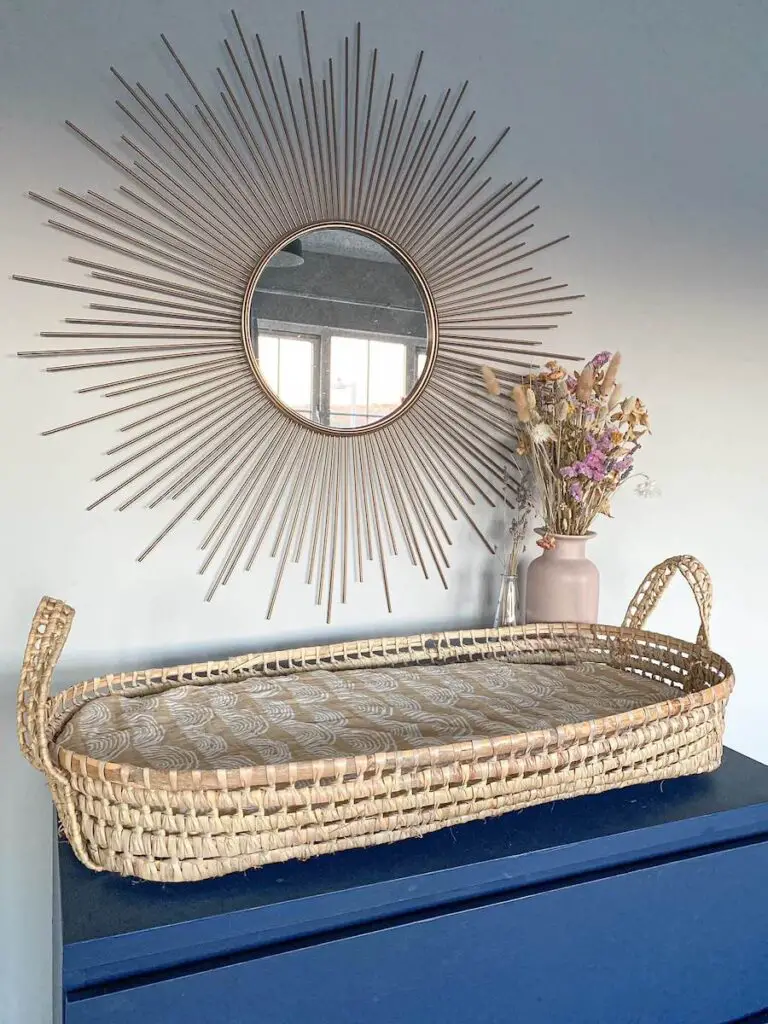
I added back in the moses basket mattress covered with this beautiful Large Muslin from Mini Monkkys and taddaa a perfect DIY Changing Basket. Now all I need is little one to arrive so we can start using it. I am so happy with how easy and simple it was and how beautifully it turned out. Let me know if you try it and tag me on Instagram @katieflossblog, I would love to see how yours turned out and how you style it. I highly recommend picking up one of these adorable Changing basket liners to elevate the style.

I love doing little DIY’s around the house and will definitely be doing more in the future. You can subscribe to my mailing list to get a monthly newsletter with all my latest posts in so you can keep up with all the DIY bits I do around the house. You can check out my DIY Bedroom Lights here and if you’re due to give birth soon too here are 8 Things NOT to do Before Giving Birth, you NEED to read it, I’m brutally honest.
Katie x


12 Comments
Ohhh this looks ace! I love what you’ve done with it. And it sounds super simple to do! Love the more natural aesthetic!
Claire.X
http://www.clairemac.co.uk
This is such a great DIY! I really love Moses basket and really hope to get one when I will have a kid, really love the muslin cover you used! Thank you for sharing x
This is such a great idea. I’m defo one for upcycling where possible. I have heard that babies can be verry expensive so doing something like this would work on all budgets!
Rosie
This basket is so adorable! I love cute baby baskets, and when my little sister was born she had the sweetest Moses basket 🙂 thank you for sharing this very helpful post x
This looks like such a fun DIY! Its not something that I would personally need but I’m sure it will be so helpful for so many people x
What a great use of a Moses basket Katie! This is such a clever and cute idea x
Lucy | http://www.lucymary.co.uk
Oh wow, this is amazing! Such a great DIY project and the end result looks SO good. Like you could sell those! xxx
I never thought to have a changing basket when my kids were little. They are so cool. This would make such a beautiful, hand-made gift for someone who is expecting too.
OMG! This is so precious! I love it so much. My style is boho too so this would fit my home so well. Thanks for sharing xx
http://www.lynnmumbingmejia.com
This is so cute and seems simple enough. My little guy is almost out of the changing stage (hopefully) but this would make a lovely gift for some of my friends. Thanks for sharing!
Did I miss a step, what do you do after you cut it?? How do you attach the bottom layer to the upper edge? Really what to do this for my baby and they don’t stock this in Sweden and have it ship here is heaps expensive
No once you’ve cut the basket you just pull the cut bits off and the edge is straight. No need to attach anything. I decided to reattach the handles as I liked the look of it but no need to do that step. Let me know if you try it out x